How to Propagate Lavender: A Step-by-Step Guide
Lavender is a beautiful and fragrant plant that can be propagated easily. Propagation is a process of creating new plants from existing ones. It is a great way to expand your garden or share your favorite plants with friends and family. In this article, we will explore how to propagate lavender and provide you with step-by-step instructions on how to do it.

There are several methods to propagate lavender, including stem cuttings, layering, and seed propagation. Each method has its own advantages and disadvantages, and some are more suitable for certain types of lavender than others. By understanding the different methods and their requirements, you can choose the best one for your situation and increase your chances of success. In the following paragraphs, we will discuss each method in detail and provide you with tips and tricks to help you propagate lavender successfully.
Understanding Lavender Propagation
Lavender is a popular herb that is used for various purposes such as aromatherapy, cooking, and ornamental purposes. Propagating lavender is a simple and cost-effective way to grow this plant. Understanding lavender propagation is essential to ensure that the cuttings are successful and the plant thrives.
Types of Lavender Cuttings
There are two types of lavender cuttings: softwood and hardwood. Softwood cuttings are taken from the current season’s growth, while hardwood cuttings are taken from mature wood that is at least a year old. Softwood cuttings are easier to root than hardwood cuttings, but they are also more fragile and require more care.
Best Times for Propagation
The best time to take lavender cuttings is in the spring or early summer when the plant is actively growing. This is when the plant is producing new growth, and the stems are flexible and easy to work with. Fall is also a good time for propagation, but the cuttings will need to be protected from frost and cold temperatures.
When taking cuttings, it is essential to use a sharp, clean pair of pruning shears to prevent damaging the plant. It is also important to remove any flowers or buds from the cutting to encourage root growth.
In conclusion, understanding lavender propagation is crucial for successful growth of the plant. By using the right type of cutting and taking them at the right time, gardeners can propagate lavender with ease.
Preparation for Propagation

Selecting Cuttings
Before beginning to propagate lavender, it is important to select the right type of cuttings. Choose healthy, non-flowering stems that are at least 4 inches long. Make sure the cuttings have at least two sets of leaves and are free from any damage or disease.
Gathering Tools and Materials
To propagate lavender, you will need a few essential tools and materials. These include pruning shears, rooting hormone, soil, pots, vermiculite, perlite, potting soil, compost, plastic bag, peat moss, and rooting hormone powder.
Pruning shears are used to cut the lavender stems. Rooting hormone is essential for stimulating root growth in the cuttings. Soil, pots, and potting soil are used to plant the cuttings. Vermiculite, perlite, and compost can be added to the soil to improve drainage and provide nutrients. A plastic bag can be used to create a humid environment for the cuttings, while peat moss can be used to cover the cuttings and keep them moist.
By selecting the right cuttings and gathering the necessary tools and materials, you can ensure a successful propagation process for your lavender plants.
Propagation Techniques
Rooting Lavender Cuttings in Soil
Propagating lavender is an easy and cost-effective way to grow new plants. One of the most common methods of propagating lavender is by taking cuttings and rooting them in soil. This method involves taking a stem cutting from an existing lavender plant and planting it in soil to encourage root development.
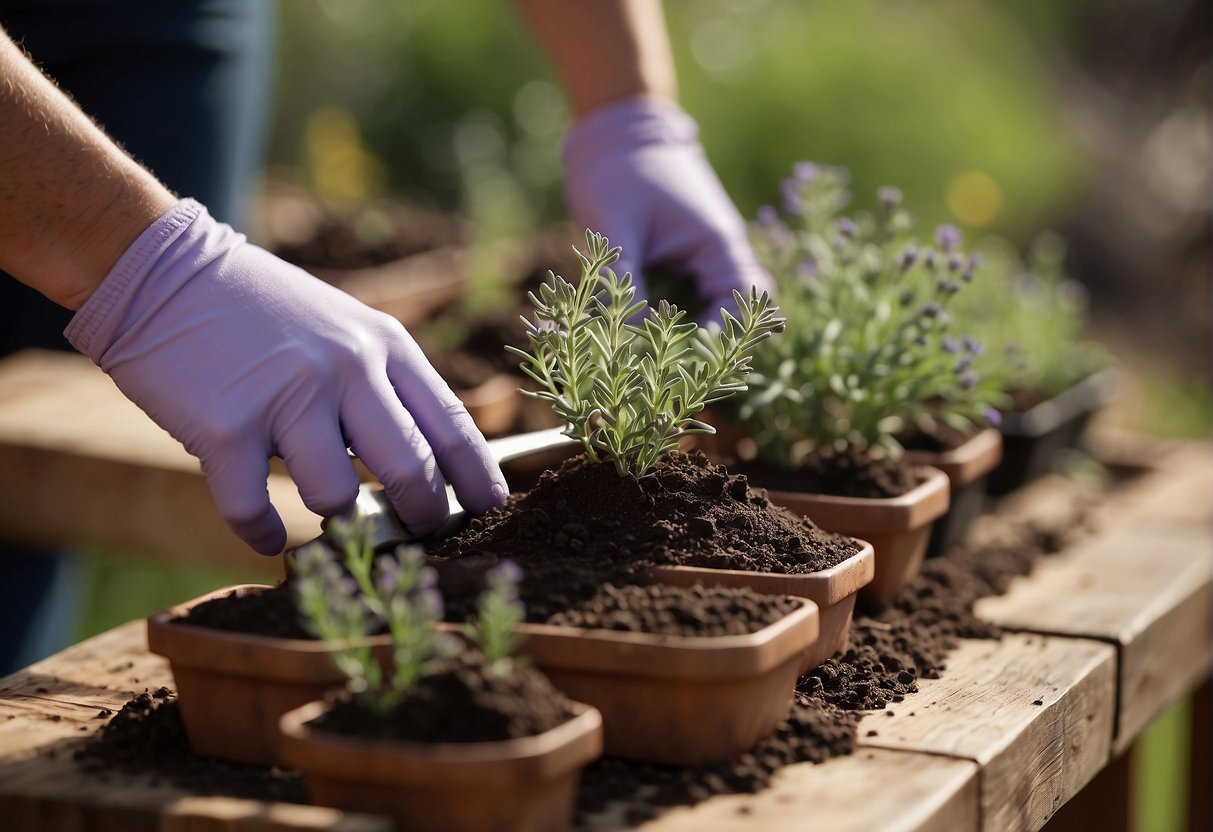
To begin, select a healthy stem from the parent plant that is approximately 3-4 inches in length. Remove the bottom leaves from the stem, leaving only the top few leaves intact. Dip the cut end of the stem in rooting hormone powder and then plant it in a pot filled with well-draining soil.
Water the soil thoroughly and cover the pot with a plastic bag to create a humid environment that will encourage root growth. Place the pot in a warm, bright location, but out of direct sunlight. After a few weeks, the cutting should begin to develop roots. Once the roots have formed, the new lavender plant can be transplanted into a larger pot or directly into the garden.
Propagating Lavender in Water
Another method of propagating lavender is by rooting cuttings in water. This method is similar to rooting in soil, but instead of planting the cutting in soil, it is placed in a jar or cup of water.
To begin, take a healthy stem cutting from the parent plant and remove the bottom leaves. Place the stem cutting in a jar or cup of water, making sure that the bottom of the stem is submerged in the water. Change the water every few days to keep it fresh and prevent the growth of bacteria.
After a few weeks, the cutting should begin to develop roots. Once the roots have formed, the new lavender plant can be transplanted into a larger pot or directly into the garden.
Overall, both of these methods are effective ways to propagate lavender. By following these simple steps, gardeners can easily grow new lavender plants from existing ones, ensuring a steady supply of these fragrant and beautiful herbs.
Caring for New Lavender Plants

After successfully propagating lavender, it is important to provide proper care to ensure the plants thrive. This section will cover the essential aspects of caring for new lavender plants.
Watering and Feeding
When it comes to watering lavender, it is crucial to strike a balance between providing enough moisture and avoiding overwatering. Overwatering can lead to root rot and other issues. Generally, lavender plants prefer well-draining soil, so it is important to ensure proper drainage.
Newly propagated lavender plants should be watered regularly, especially during the first few weeks. However, once the plants are established, it is best to water them deeply but infrequently. This encourages the roots to grow deeper in search of moisture, resulting in a healthier plant.
In terms of feeding, lavender plants do not require a lot of fertilizer. Over-fertilizing can actually harm the plants. A balanced fertilizer can be applied once or twice a year, but it is important to follow the manufacturer’s instructions and not exceed the recommended amount.
Transplanting and Acclimatization
When transplanting lavender plants, it is important to do so carefully to avoid damaging the roots. It is best to transplant lavender in the spring or fall when the weather is mild.
Before transplanting, the new plants should be acclimatized to their new environment. This can be done by gradually exposing them to more sunlight and outdoor conditions over the course of a week or two.
When transplanting, it is important to choose a well-draining location with plenty of sunlight. Lavender plants prefer a warm place with indirect sunlight. The soil should be amended with sand or gravel to improve drainage.
In conclusion, caring for new lavender plants involves providing proper watering and feeding, as well as careful transplanting and acclimatization. By following these guidelines, lavender plants can thrive both indoors and outdoors in a variety of environments.
Troubleshooting Common Issues

Dealing with Pests and Diseases
Lavender is generally a hardy plant that is resistant to many pests and diseases. However, there are still some common issues that can arise. One of the most common pests that can affect lavender is ticks. These tiny creatures can cause damage to the leaves and flowers of the plant. If you notice any ticks on your lavender, you can remove them by hand or with a pair of tweezers. Regularly inspecting your plants can help prevent a tick infestation.
Another common issue is disease. Lavender is susceptible to a few different diseases, such as root rot and leaf spot. These diseases can cause the plant to wilt and die. To prevent disease, it is important to ensure that your lavender is planted in well-draining soil. Avoid overwatering and make sure that the plant has good air circulation. If you notice any signs of disease, such as yellowing leaves or brown spots, remove the affected parts of the plant and dispose of them immediately.
Addressing Poor Root Development
Healthy lavender plants require strong root systems to thrive. If you notice that your lavender is not developing roots properly, there are a few things you can do to address the issue. First, make sure that the plant is getting enough water. Lavender prefers well-draining soil, but it still needs to be watered regularly. If the soil is too dry, the plant may not be able to develop roots properly.
Another common issue is over-fertilization. Lavender does not require a lot of fertilizer, and too much can actually harm the plant’s root development. If you have been fertilizing your lavender regularly and notice poor root development, cut back on the fertilizer and give the plant some time to recover.
Finally, patience is key when it comes to lavender root development. It can take several months for the plant to develop a strong root system, so don’t be discouraged if you don’t see immediate results. With proper care and attention, your lavender should develop strong roots and grow into a healthy plant.
Frequently Asked Questions

What is the best method to propagate English lavender from cuttings?
The best method to propagate English lavender from cuttings is by using semi-hardwood cuttings. Cuttings should be taken from the current season’s growth, and the stem should be around 4-6 inches long. Remove the lower leaves and dip the cut end in rooting hormone before planting in well-draining soil. Keep the soil moist and the cutting in a warm, bright location.
Can softwood lavender cuttings be rooted in water, and if so, how?
Softwood lavender cuttings can be rooted in water, but it is not recommended. Lavender is sensitive to changes in temperature and pH, which can occur when the cutting is moved from water to soil. It is best to root lavender cuttings directly in soil.
What steps should be taken to ensure lavender cuttings grow indoors?
To ensure lavender cuttings grow indoors, provide them with bright, indirect light and keep the soil moist but not waterlogged. A humidity dome can also be used to help the cuttings retain moisture. Avoid placing the cuttings near drafts or in areas with fluctuating temperatures.
Why might lavender cuttings wilt or die, and how can this be prevented?
Lavender cuttings may wilt or die if they are overwatered or underwatered. It is important to keep the soil moist but not waterlogged. Additionally, cuttings may wilt if they are placed in direct sunlight or in an area with fluctuating temperatures. To prevent this, provide the cuttings with bright, indirect light and keep them in a warm, stable location.
Is it possible to propagate lavender during winter, and what are the best practices?
It is possible to propagate lavender during winter, but it may be more difficult due to lower light levels and cooler temperatures. To propagate lavender during winter, take cuttings as usual and provide them with bright, indirect light and a warm location. A heat mat can also be used to help promote root growth.
How can honey be used in the process of propagating lavender?
Honey can be used as a natural rooting hormone when propagating lavender. Simply dip the cut end of the cutting in honey before planting in soil. The honey will help to stimulate root growth and protect the cutting from disease. However, it is important to use raw, unpasteurized honey for best results.


