How to Propagate Sedges: A Step-by-Step Guide for Successful Growth
Last updated: January 30, 2026
Sedges, part of the Cyperaceae family, are tough, grass-like plants that adapt to all sorts of conditions. You can propagate sedges pretty easily—just divide established clumps or start from seed.
Dividing mature clumps works best if you want healthy new growth and quick results.

When you divide sedges, you get more plants fast and keep the exact traits of the parent. Growing from seed is possible too, but it takes more patience and a bit of luck with the right germination conditions.
Understanding Sedges and Their Ecological Importance
Sedges really stand out in plant communities because of their structure and function. They aren’t grasses or rushes, even if they look similar at first glance.
You’ll find them in native grassland habitats, where they help restore and support ecosystems.
Differences Between Sedges, Grasses, and Rushes
Sedges belong to Cyperaceae, grasses to Poaceae, and rushes to Juncaceae. Here’s a quick trick: sedges usually have triangular stems (“sedges have edges”), while grasses have round, hollow stems and rushes have round, solid ones.
Leaf arrangement is another giveaway. Sedges grow leaves in three ranks, grasses in two. That subtle difference actually changes how they compete with neighbors.
These traits let sedges thrive in places where other graminoids might struggle, especially in wet, soggy ground.
Common Names and Native Grassland Distribution
People sometimes call sedges “nut-rushes,” though names shift by region. Lots of species are native to temperate and tropical grasslands, especially across North America, Europe, and Asia.
Sedges mix in with native grasses and forbs, building up diverse plant communities. They’re often happiest in damp soils, but a few can handle dry spots too.
If you’re working on restoration, picking native sedges keeps local biodiversity strong and supports native grasslands.
Role in Ecosystems and Habitat Restoration
Sedges stabilize soil and fight erosion with their dense roots. They filter water, boost soil health, and give shelter to all sorts of wildlife—think insects, birds, even small mammals.
Animals munch on sedge seeds and shoots, especially in wetlands and grasslands. Their presence keeps graminoid diversity up, supporting complex food webs.
Restoration projects rely on sedges because they bounce back in tough conditions. They’re a key part of bringing damaged landscapes back to life.
Essential Growing Conditions for Successful Propagation
Getting the light, soil, and moisture right makes all the difference when propagating sedges. Healthy roots start with the right conditions.
Knowing what your chosen sedge needs helps you pick the right spot and care routine.
Optimal Sunlight and Partial Shade Requirements
Most sedges like full sun to partial shade. Four to six hours of direct sun daily usually keeps them happy, though they’ll tolerate a bit more shade.
Too much shade or dense tree cover can slow their growth. In hot climates, partial shade keeps leaves from scorching and helps the plant hold onto moisture.
A spot with morning sun and afternoon shade often works best, especially during the hottest months.
Soil Preferences: Well-Drained, Wet, and Rain Garden Applications
Sedges handle a range of soils but really prefer moist, well-drained spots. If the soil holds some moisture without getting soggy, roots stay healthy.
Rain gardens love sedges—they stabilize wet soils and help manage runoff. Their roots filter water and can handle periods of saturation.
Clay soils that don’t drain well need amending, or you might go with raised beds. Sandy soils can work if you keep up with watering.
Watering, Temperature, and Height Considerations
Keep watering consistent, especially during the first season. The soil should stay damp but not swampy.
Most sedges do best between 50°F and 85°F. Big temperature swings or extended dry spells can slow them down.
Heights vary a lot—some sedges stay under a foot, others shoot up past three feet. Taller types might need staking or a sheltered spot to keep them upright.
Methods to Propagate Sedges

Timing and technique matter when you’re propagating sedges. Whether you’re starting from seed or dividing clumps, pay attention to the season—early spring and flowering periods are key.
Sowing Seeds: Timing, Techniques, and Germination
Sedge seeds need the right setup to sprout. Late fall or early spring is usually the sweet spot, since cooler temps mimic nature and boost germination rates.
Cover seeds lightly with soil or sand—enough to keep them moist but not in the dark. Keep the area damp, not soggy. Depending on the type, germination takes about 2 to 4 weeks.
Some seeds need cold stratification, meaning a few weeks in chilly, damp conditions before sowing. That helps break dormancy. Watch temperature and moisture closely for the best results.
Dividing Perennial Clumps in Early Spring
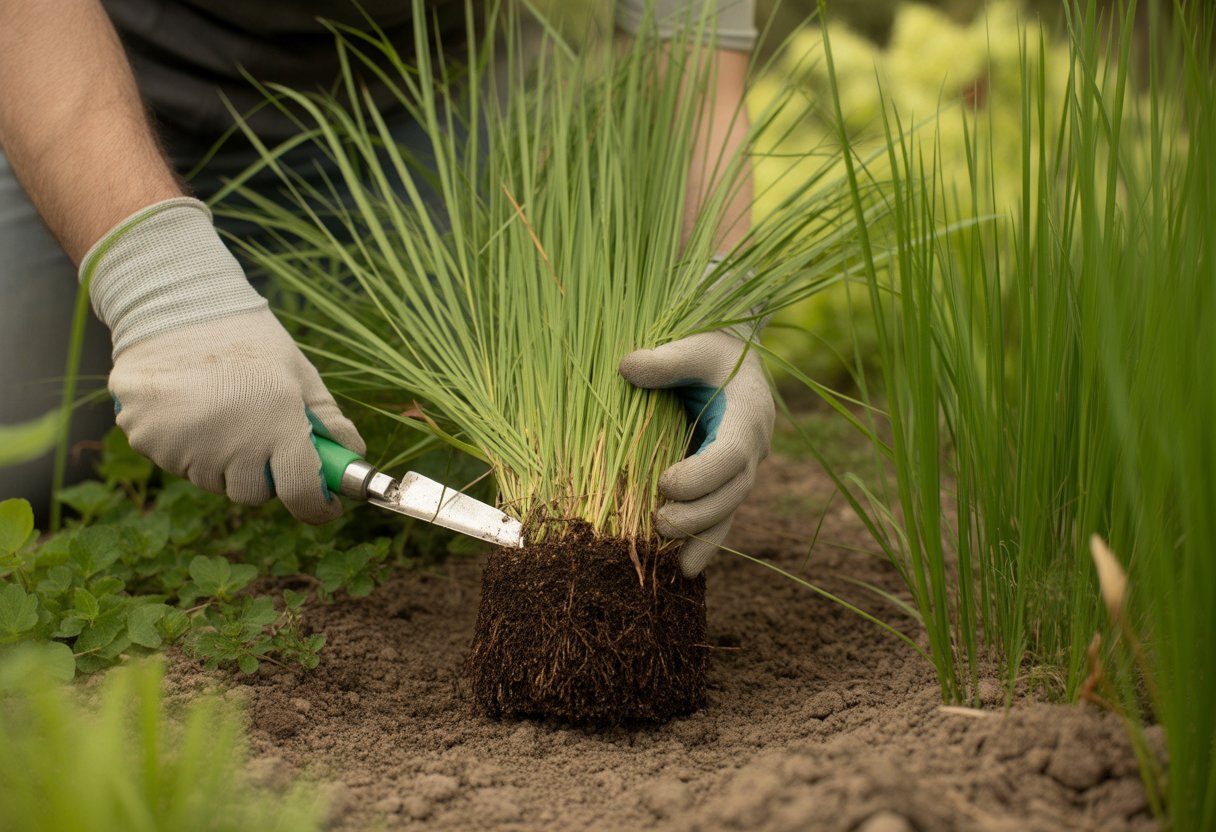
Divide sedge clumps in early spring, right as new growth kicks in. You’ll get strong new shoots and keep the plant’s original traits.
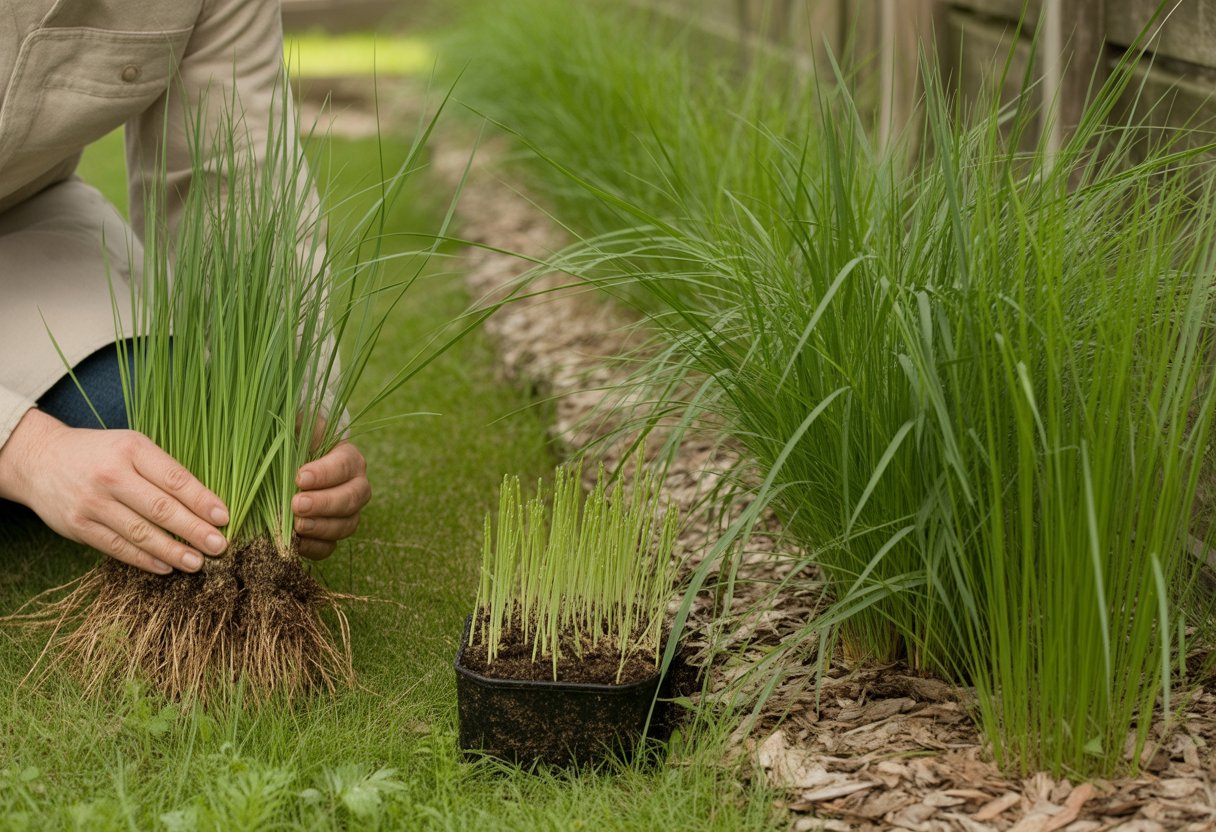
Dig up the whole clump and split it into smaller pieces, making sure each chunk has healthy roots and shoots. Use a sharp tool for clean cuts. Get the divisions back in the ground quickly, in soil with good drainage.
Water them well after planting and keep the soil moist for a few weeks. Dividing in early spring helps the plants settle in before they bloom in June or July.
Transplanting and Caring for Young Sedges
After transplanting, young sedges need steady conditions. Plant them in partial shade to full sun, depending on what they like best.
Use soil with plenty of organic matter and keep watering regular. Don’t let the soil dry out, especially that first month. A thin layer of mulch helps lock in moisture and keeps the soil temperature steady.
Keep an eye out for wilting or yellowing leaves. Tweak water and light as needed. A little fertilizer during the growing season can give them a boost.
Managing Seed Dispersal and Flowering From June to July
Sedges flower mostly from June to July, which is when they crank out seeds in spikelets.
If you want more plants, let seeds drop naturally. But if you’re trying to keep things tidy, collect seeds before they fall.
Wind and water spread sedge seeds, so planting near water or open ground helps with natural dispersal. Snip off spent flower heads after seeds drop to keep self-seeding in check.
Benefits and Uses of Propagated Sedges in Restoration Projects

Propagated sedges make a real difference in habitat restoration. They hold soil in place and boost biodiversity, thanks to those tough roots.
Erosion Control With Vigorous Root Systems
Sedges send out thick, fibrous roots that grab onto soil. This makes them perfect for stopping erosion, especially along streams, wetlands, and slopes.
Their roots dig deep and weave a network that keeps soil from washing away during storms or floods.
Adding propagated sedges to restoration sites keeps slopes stable and helps crowd out invasive species that might otherwise take over.
Supporting Wildlife and Native Plant Communities
Sedges give all sorts of wildlife a place to call home—think insects, birds, and even small mammals. Their thick leaves make great shelter, and honestly, who wouldn’t want free nesting material?
They also toss out seeds, which end up as food for plenty of critters.
In native plant communities, sedges fill gaps that grasses or reeds might leave open. This bump in plant diversity means the whole ecosystem gets a little more resilient.
When people add sedges during restoration projects, they help rebuild habitats that feel balanced again. Plants and animals start interacting in new ways, and the place just feels more alive.
![]() Looking for a nursery that carries native sedges?
Looking for a nursery that carries native sedges?
Browse our native plant nursery directory


