Curing Onions in Humid Weather: Ventilation and Storage Checks
Last updated: November 6, 2026
The standard advice for curing onions assumes a run of warm, dry, breezy days. Many gardeners harvest into the opposite: muggy air, heavy dew every morning and thunderstorms in the forecast.
Humidity does not make curing impossible, but it changes the job. The goal is still a dry, tight neck and papery outer skins. You just have to supply the airflow and shelter the weather won’t.
This guide covers where to cure when the air is damp, how to tell when the onions are really done, and the storage checks that catch problems before they spread through the whole batch.
The Short Answer
In humid weather, cure onions under cover with constant air movement, and don’t trust the calendar:
- Lift on a dry day and get the bulbs out of the rain and dew.
- Cure in a warm, sheltered, well-ventilated spot such as a porch, open shed, garage with doors open, or greenhouse with sides open, ideally 75–90°F.
- Spread them in a single layer on screens or slatted racks, or hang them in loose bunches, and run a fan if the air is still.
- Leave the tops on until the necks are completely dry. Cutting green necks invites neck rot.
- Call it cured only when the neck is tight and the skins rustle, which can take 2–4 weeks in damp weather.
- Store cool, dry and ventilated, and check every week or two.
What Curing Actually Does
Curing is the drying-down period after harvest. The neck, which was a living channel between leaves and bulb, dries and seals. The outer scales lose moisture and become protective skins.
UMass Extension describes cured onions as having a tight neck and dry outer scales that rustle when handled, a point it says is reached when bulbs have lost about 3 to 5 percent of their weight. University of Minnesota Extension puts it simply: curing is essential if you plan to store onions, and poor curing leads to decay in storage.
The decay to worry about most is neck rot. Utah State University Extension notes that most infections happen when onions are harvested before the leaves and necks are dry, and that the fungus cannot penetrate a dry neck.
Curing Targets
| Temperature | About 75–90°F (University of Minnesota and UMass extension). |
| Air | Constant movement around every bulb. A fan helps in still, humid air. |
| Light | Shade or indirect light. Hot sun in the 90s can scald bulbs (UMass). |
| Time | 2–4 weeks under shed or field conditions, depending on weather (UMass, University of Minnesota). |
| Done when | Neck tight, tissue won’t slide when rolled between fingers, outer skins dry and rustling. |
Check 1: Harvest Timing and Conditions
Curing starts in the garden. Onions that were watered right up to harvest go into curing wetter, and that is harder to fix in humid weather. Ease off water as tops begin to fall, as covered in when to stop watering bulbing onions.
University of Minnesota Extension recommends harvesting on dry, cool days to limit post-harvest disease. If a stretch of rain is coming and the tops are mostly down, lift before it arrives rather than after.
Handle bulbs gently. University of Maryland Extension notes careful handling to avoid bruising helps prevent storage rots, and UMass says bruises are direct entry points for disease.
Check 2: Is the Field Option Off the Table?
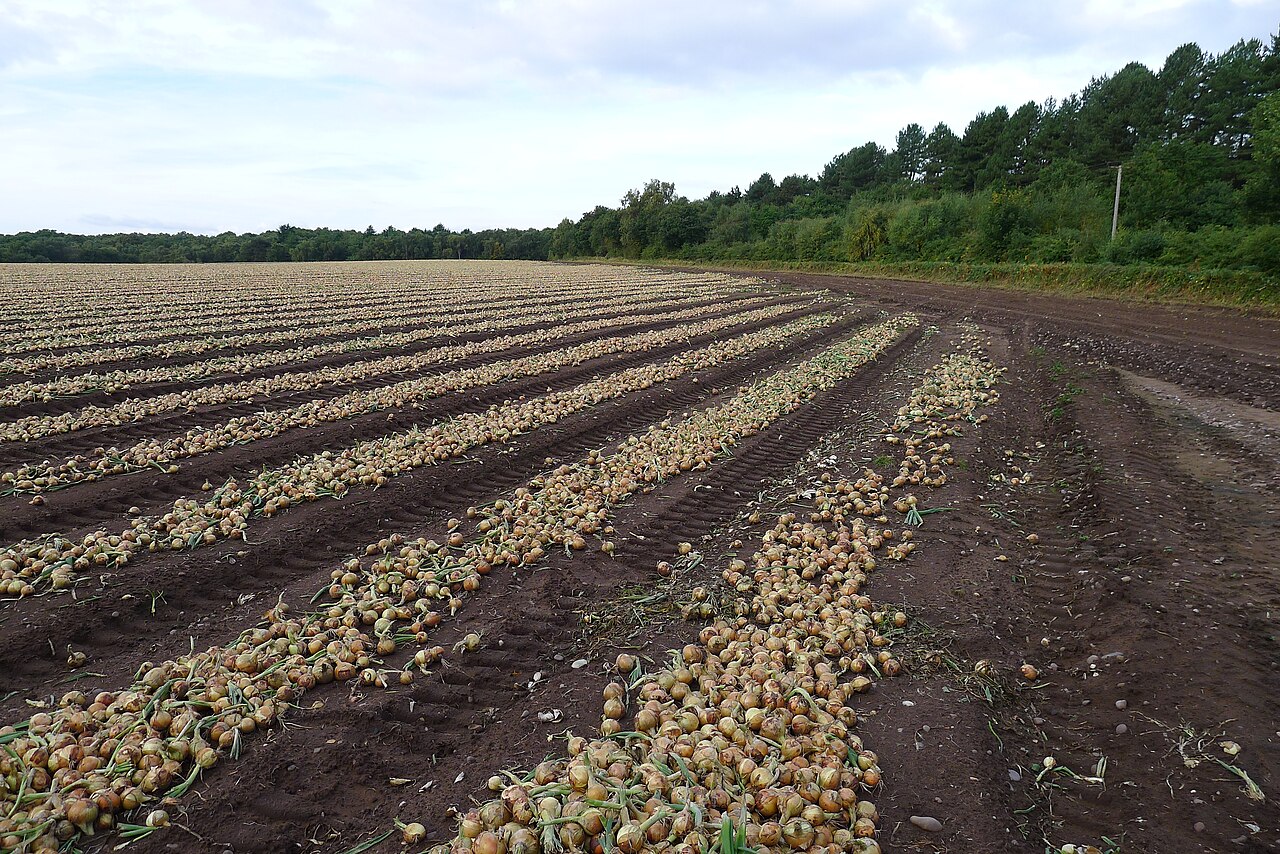
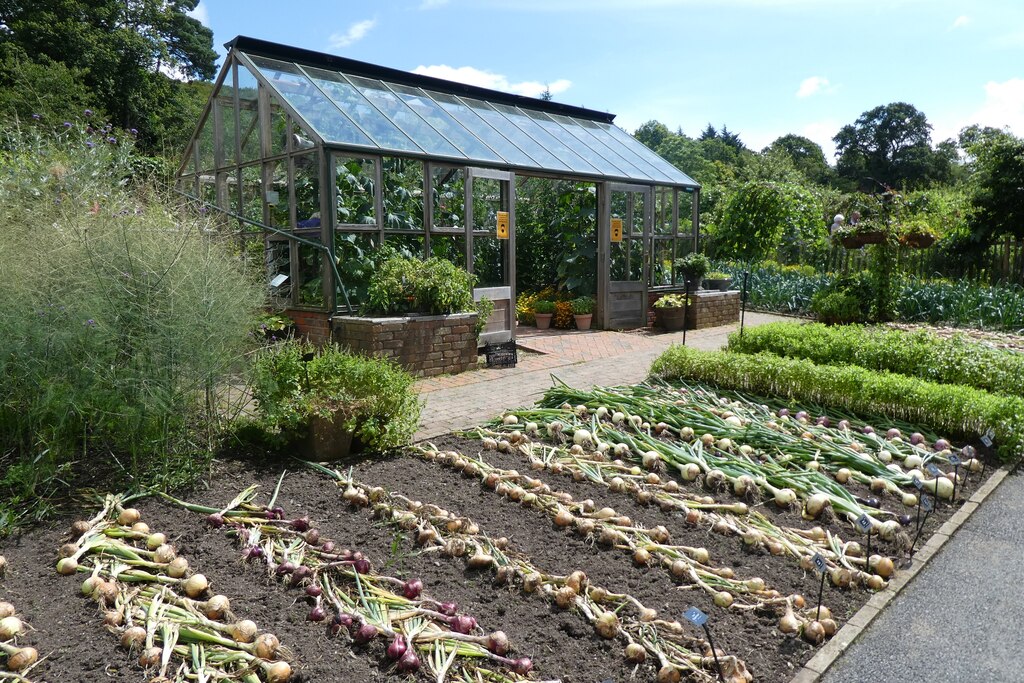
Field curing means leaving lifted onions on the soil surface for several days. University of Minnesota Extension says that is fine if the weather will be dry and warm; otherwise bring them indoors to cure.
UMass Extension is blunter about damp conditions. Avoid field curing if rain is forecast. If it does rain, let the onions dry fully before handling them, and don’t handle wet bulbs. A weedy patch can stay moist with little air circulation, which UMass says makes it unsuitable for curing.
In practice, if your forecast shows daily dew, rain or humidity that never drops, skip field curing and go straight to a covered spot.
Check 3: Set Up a Covered, Ventilated Curing Space
You need a roof against rain and dew, warmth, and air that keeps moving. University of Maryland Extension suggests a well-ventilated attic or porch out of direct sun for 1 to 2 weeks; in humid weather, expect it to take longer.
UMass Extension recommends a greenhouse or hoophouse for curing because you can control temperature, airflow and moisture. Keep it below 85°F by running fans and opening sides and doors, and use 30 to 50 percent shade cloth over the house or crop.
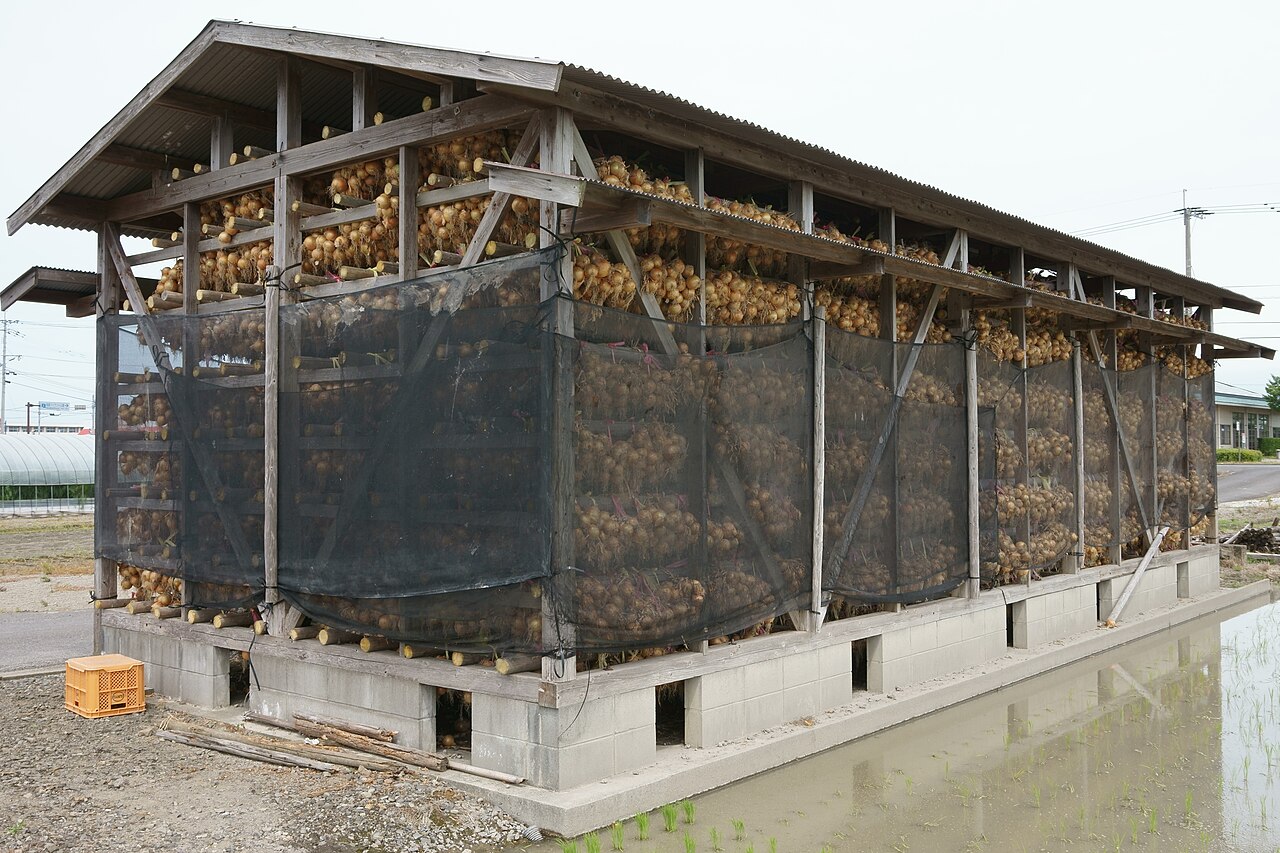
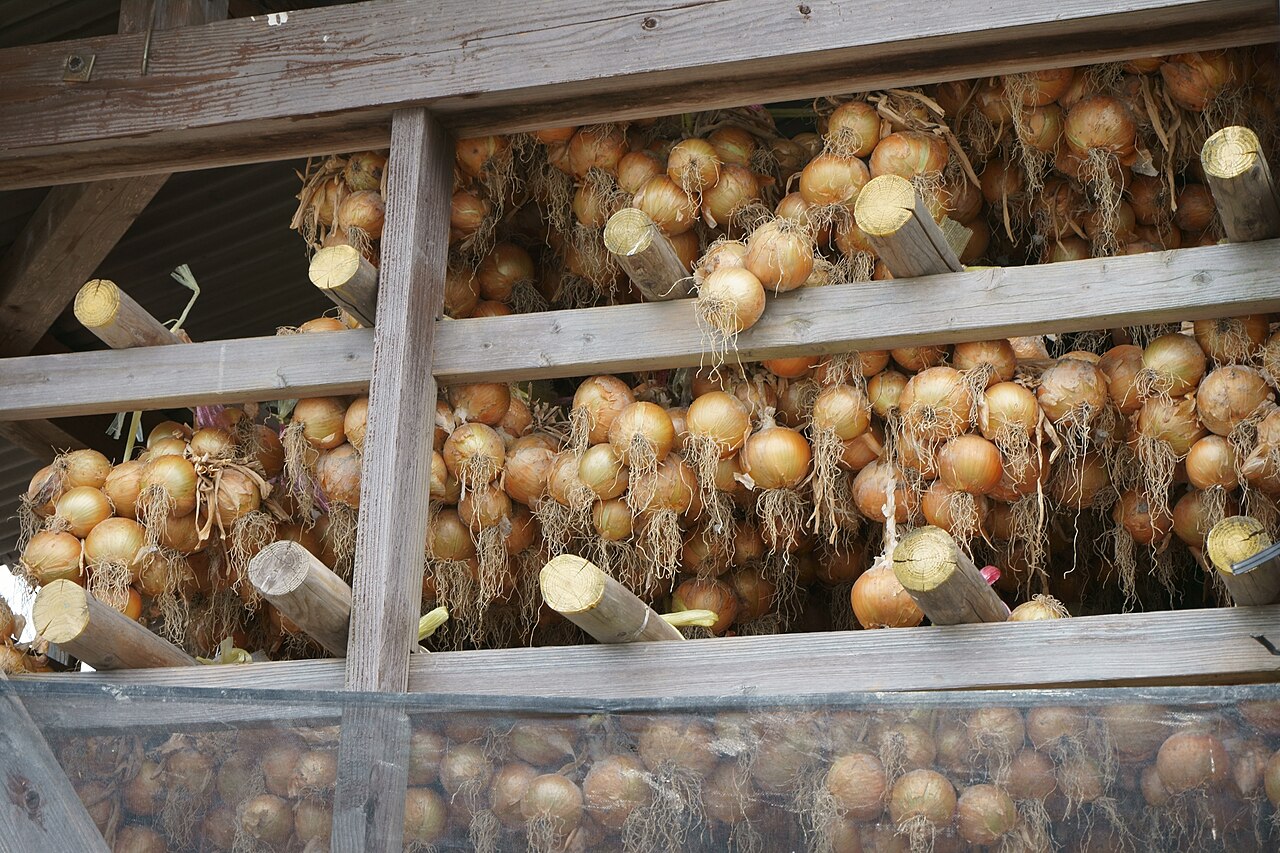
Without a greenhouse, an open garage, carport or covered porch works. Lay bulbs in a single layer on window screens, wire mesh or slatted shelves so air reaches the bottoms, or tie them in small bunches and hang them. A box fan on low makes a real difference when the air is still.
Check 4: Leave the Tops On Until the Necks Are Dry
It is tempting to trim tops right away so the onions look tidy. In humid weather, that is the most common mistake.
UMass Extension warns that cutting through any part of the top while it is still green or moist may cause excessive Botrytis neck rot in storage, and advises that in very wet years you shouldn’t top onions until after they are cured. Colorado State University Extension likewise says to dry necks before topping.
When you do trim, leave some neck. UMass suggests leaving 2 to 3 inches, which increases the distance a pathogen has to travel from the cut to the bulb. Maryland Extension trims to about 1 inch for home storage, so anywhere in that range is reasonable once necks are fully dry.
Check 5: Test for “Done” by Feel, Not by Days
The UMass test is simple: roll the neck between your fingers. If the tissue slides, it is still green inside. If it feels tight and papery, the neck has sealed.
The outer skins should be dry and rustle when you handle the bulb. Minnesota Extension describes the endpoint as dry outer bulb scales and a tight neck.
In dry summers this can take a week or two. In humid weather it can take the full two to four weeks UMass and Minnesota describe. Check a few of the thickest-necked onions, because those dry last.
Check 6: Sort Before Storing
Go through every onion before it goes into storage. UMass Extension recommends grading out damaged bulbs, because damaged bulbs give off moisture that favors disease in storage.
Pull out for immediate use anything bruised, cut, soft, thick-necked or still green at the top. That includes any onions that bolted, which are covered in onion sets bolting early.
Keep only firm, fully dry bulbs with tight necks for long storage.
Troubleshooting at a Glance
| Necks still soft after 2 weeks | Normal in humid weather. Add a fan, raise the temperature if you can, keep waiting. |
| Mold on the outer skins | Too little airflow. Spread out, add a fan, peel off only the moldy outer layer once dry. |
| Bulbs got rained on | Let them dry fully before handling (UMass), then continue curing under cover. |
| Soft, gray, sunken neck in storage | Likely neck rot. Remove that bulb and check its neighbors. |
| Sprouting in storage | Storage too warm. Move to a cooler spot; use sprouting bulbs first. |
Storage Checks for Humid Climates
Commercial storage targets are about 32°F with 65 to 70 percent relative humidity, according to UMass and University of Maryland Extension. Maryland notes that at those conditions onions can keep for 6 to 7 months, while ventilated bags or boxes in a cool basement or garage keep them 2 months or more.
Home storage rarely hits those numbers, so focus on what you can control: cool, dark, dry and ventilated. South Dakota State Extension suggests about 50°F in mesh sacks, ventilated crates or boxes with holes, and warns that bulbs that freeze will likely rot when they thaw.
Watch for condensation. Colorado State Extension notes that poor ventilation, high humidity and temperatures over 40°F favor storage rot, and that moving cold onions into warm, moist air increases rot. UMass advises bringing onions down to storage temperature slowly rather than chilling them well below the day’s average.
Keep cured onions out of the light. UMass notes light exposure after curing turns the outer scales green.
Spotting Neck Rot Early
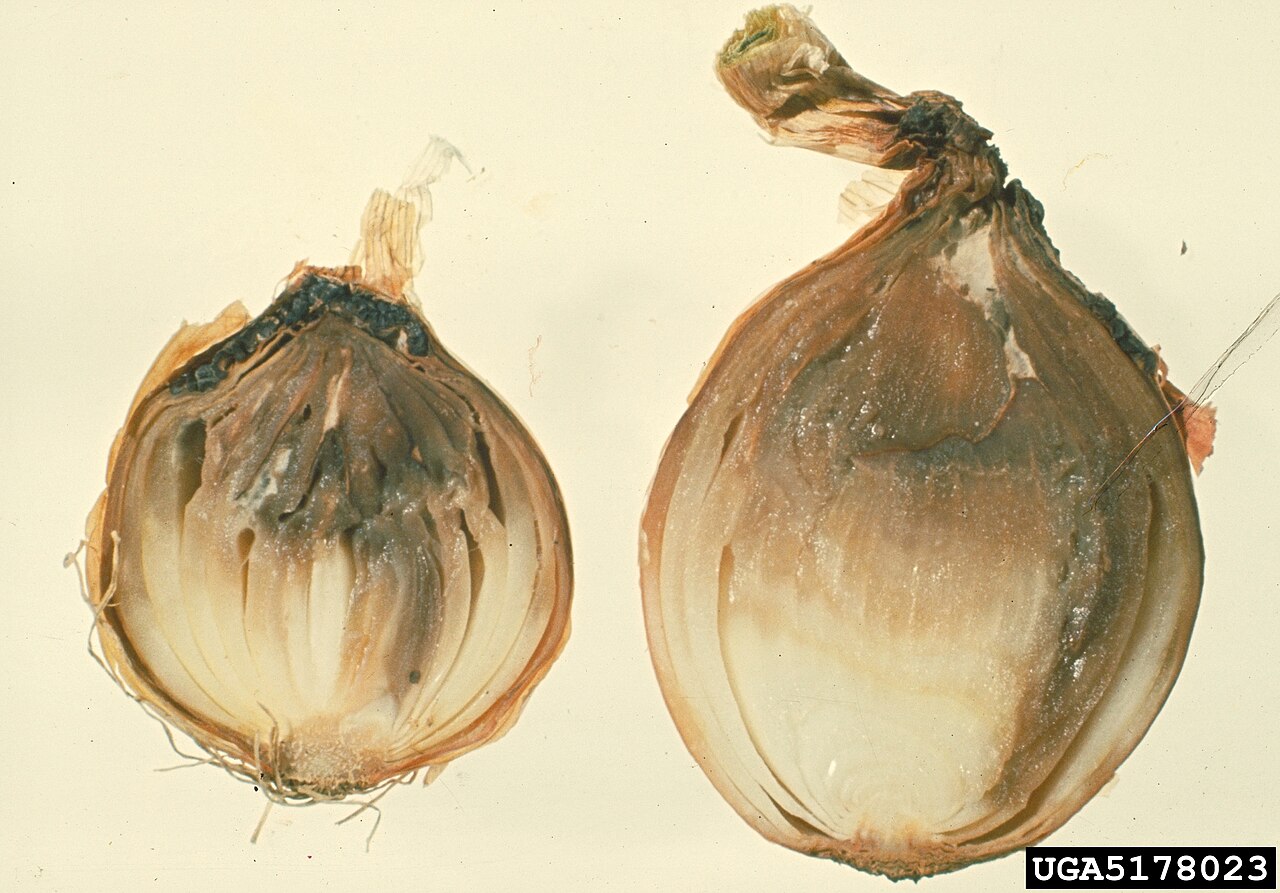
Utah State Extension notes neck rot symptoms often don’t show until onions have been stored for 1 to 2 months. Look for a neck that looks sunken, with scales that appear water-soaked and turn gray to dark brown.
Squeeze the neck of each onion when you check the bin. A soft or damp neck is a warning sign even before the bulb looks bad.
Remove any suspect bulbs right away and use the sound parts promptly if the rot is small. Colorado State notes these fungi survive on debris and cull piles, so don’t toss rotten onions onto the garden bed.
A Season-by-Season Plan
- Before harvest: prepare a covered curing spot with screens or racks and a fan. Ease off watering as tops fall.
- Harvest: lift on a dry day, handle gently, and leave tops on.
- Weeks 1–4: cure at 75–90°F in shade with moving air. Check necks every few days.
- When cured: trim tops above the bulb, sort out damaged or thick-necked bulbs, and move to cool, dark, dry storage gradually.
- Through winter: check every week or two. Use softening or sprouting bulbs first, as Utah State Extension advises.
Planning the next crop? Bulb size and neck thickness are set long before curing: see onions growing leaves but no bulbs for variety and day length, and onion seedlings falling over for a strong start. The same curing approach applies to relatives; our shallot guide and garlic guide cover their harvest, and our onion planting guide and onion sets guide cover planting.
Frequently Asked Questions
How long does it take to cure onions in humid weather?
Plan on 2 to 4 weeks, the range UMass and Minnesota Extension give for shed or field curing. Judge by feel: tight neck and rustling skins.
Can I cure onions indoors with air conditioning?
A cool, dry room with good air movement will dry onions, but more slowly than the 75–90°F extension services recommend. A warm, sheltered, ventilated spot with a fan is usually faster.
Should I cut the tops off before curing?
No. Leave tops on until the necks are fully dry. UMass Extension warns that cutting green or moist tops increases neck rot, especially in wet years.
Can I braid onions to cure them?
Yes, once the tops are dry enough to bend but before they become brittle. Braids and hanging bunches let air move around each bulb. University of Minnesota Extension notes properly dried onions can be braided or topped.
Why are my cured onions rotting at the neck?
Usually the necks were not fully dry when topped or stored, or storage is too warm and humid. Utah State Extension notes the neck rot fungus cannot penetrate a dry neck.
Sources
- UMass Amherst Extension, Harvesting & Curing Onions: curing temperature and time, greenhouse curing, rain, topping, neck test, sorting, storage.
- University of Minnesota Extension, Growing onions in home gardens: curing temperature and duration, field vs. indoor curing, harvest weather.
- University of Maryland Extension, Growing Onions in a Home Garden: porch or attic curing, trimming, storage conditions and life.
- Utah State University Extension, Botrytis Neck Rot and How to Grow Onions in Your Garden: neck infection, symptoms, storage checks.
- Colorado State University Extension, Botrytis, Downy Mildew, and Purple Blotch of Onion: storage rot conditions, condensation, debris.
- South Dakota State University Extension, Growing Onions: home storage temperature and containers.